Photo at the ISS on the Sun? A superzoom camera is OK!
Published by SC in Posts · 26 September 2018
Tags: ISS transit Sun, Nikon Coolpix P900, Nikon, superzoom camera
Tags: ISS transit Sun, Nikon Coolpix P900, Nikon, superzoom camera
Photo at the ISS on the Sun? A superzoom camera is OK!

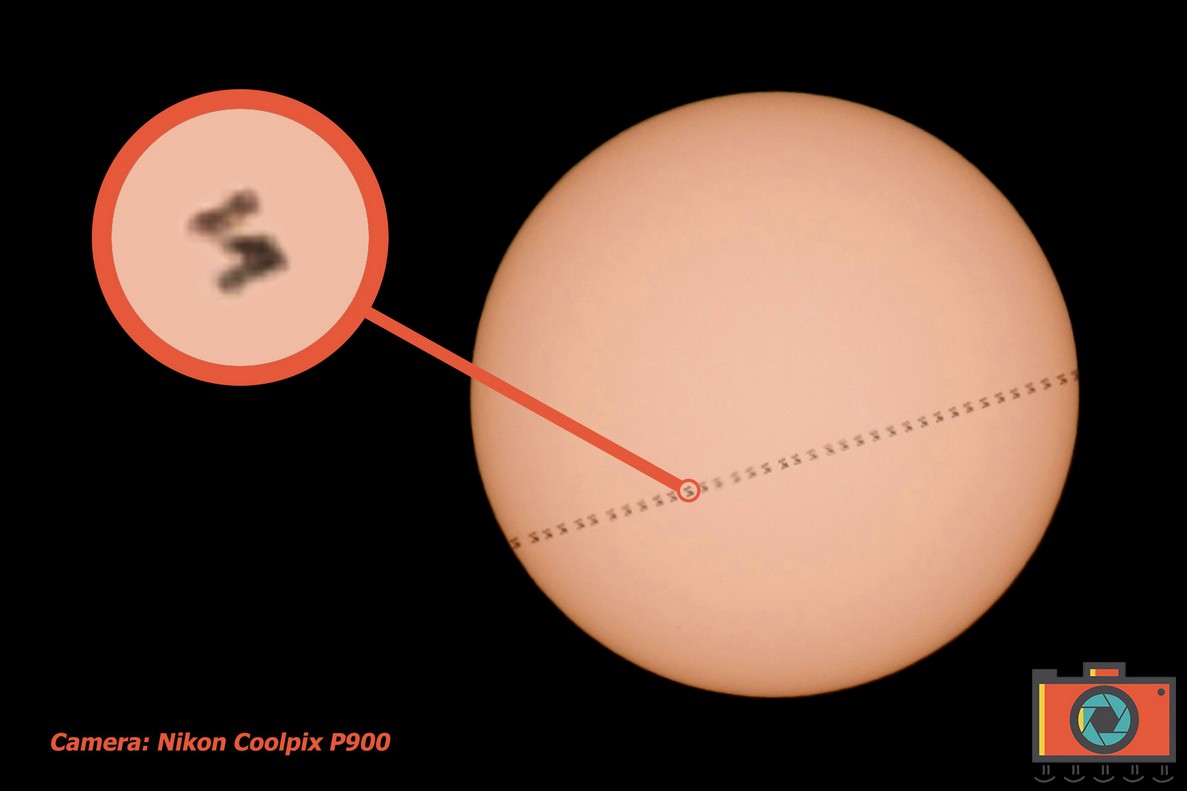
[Transit of the ISS on the Sun obtained with Nikon Coolpix P900]
ISS or the International Space Station! I guess you've already heard of it, if only by some TV news when one of our astronauts goes up. For more detailed information you can find everything on Wikipedia, we just need to know that it is the single structure created by the largest man in the space and as such can not be only observed, but also photographed and filmed! :D
So what are we waiting for? Let's begin!
STEP 0: Eye safety!
Solar observation is dangerous. NEVER LOOK THE SUN DIRECTLY, especially if you use some kind of optical instrument and without appropriate and reliable filtering. SEEING FOR THE SUN WITHOUT EYE PROTECTION ALWAYS WILL RESULT IN A SERIOUS DAMAGE TO THE EYES UNTIL THE COMPLETE LOSS OF THE VIEW. THEREFORE ATTENTION! To reduce the risk, if not that for the sensor of your camera if you will make a wrong observation of theSun, look only through a screen or via an electronic viewfinder!
STEP 1: Where and when to observe the transit of the ISS on the Sun?
To get a good result you need first of all an excellent planning. This concept is always valid, but here it is essential. In fact, in the best of cases, the transit of the ISS on the sun lasts a maximum of 1 or 2 seconds, therefore very fast!
We must also consider that the ISS does not always fly over the same areas of the Earth, so it is not visible every day from the sky above the house.
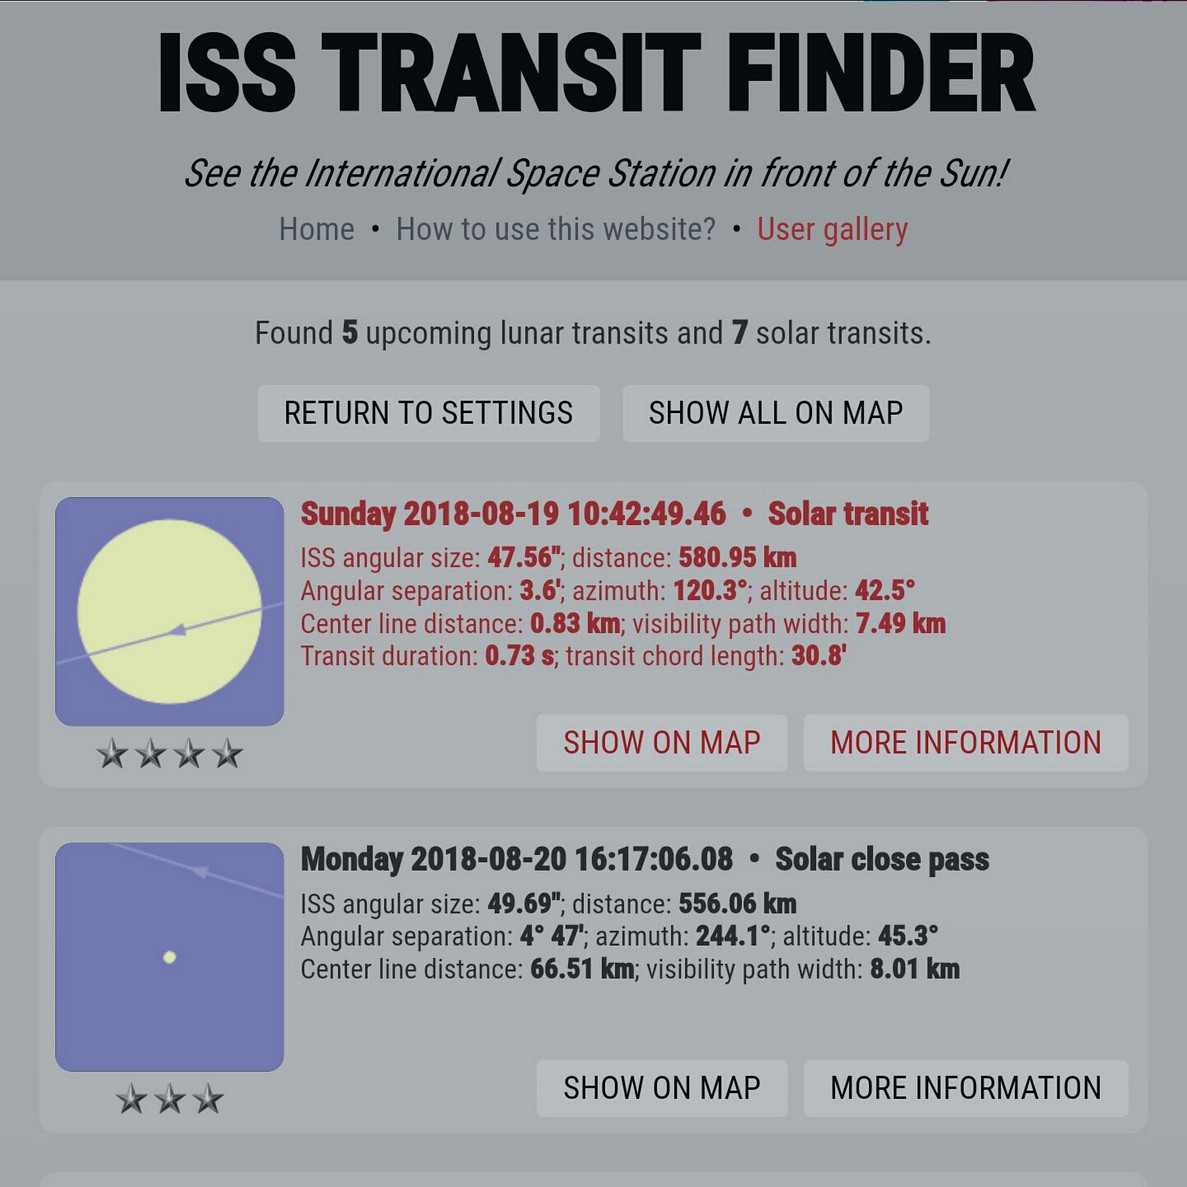
Moreover, placed a fixed position on Earth to do the observation, the visible passages of the ISS on the Sun are certainly not frequent and they are not equal to each other, but they can be more or less good. The main parameter to consider is the angular dimension of the ISS. Measured in arc seconds, defines how large the station will look to the observer.
Besides all this we must consider the weather factor ready to ruin everything.
There are many variables to consider and there is only one solution: to use the right tools! Which?

[ISS Transit Finder Screenshot]
- The excellent website transit-finder.com helps us by identifying all the visible passages of the ISS from the Earth, within a certain radius of kilometers from home or from a position from we determined. In addition to this it provides us with the exact time of transit set on the time zone of where the search is performed, its duration, its direction and a star rating of how much the transit will be good as observability. The most known and observable ISS passages are those on disk of the the Sun or Moon. Found the best visible ISS transit, help yourself with the map to find the best point to observe it.
- A clock adjusted with the satellite to have accuracy per second, in case you do not have one, download a free APP like DIGITAL CLOCK SHG2 for Android or you should look for something similar on iOS
- The day before, watch the weather!
STEP 2: HOW TO PHOTOGRAPH the transit of the ISS on the Sun?
[ Check price at Amazon.com || Check price at Ebay ]
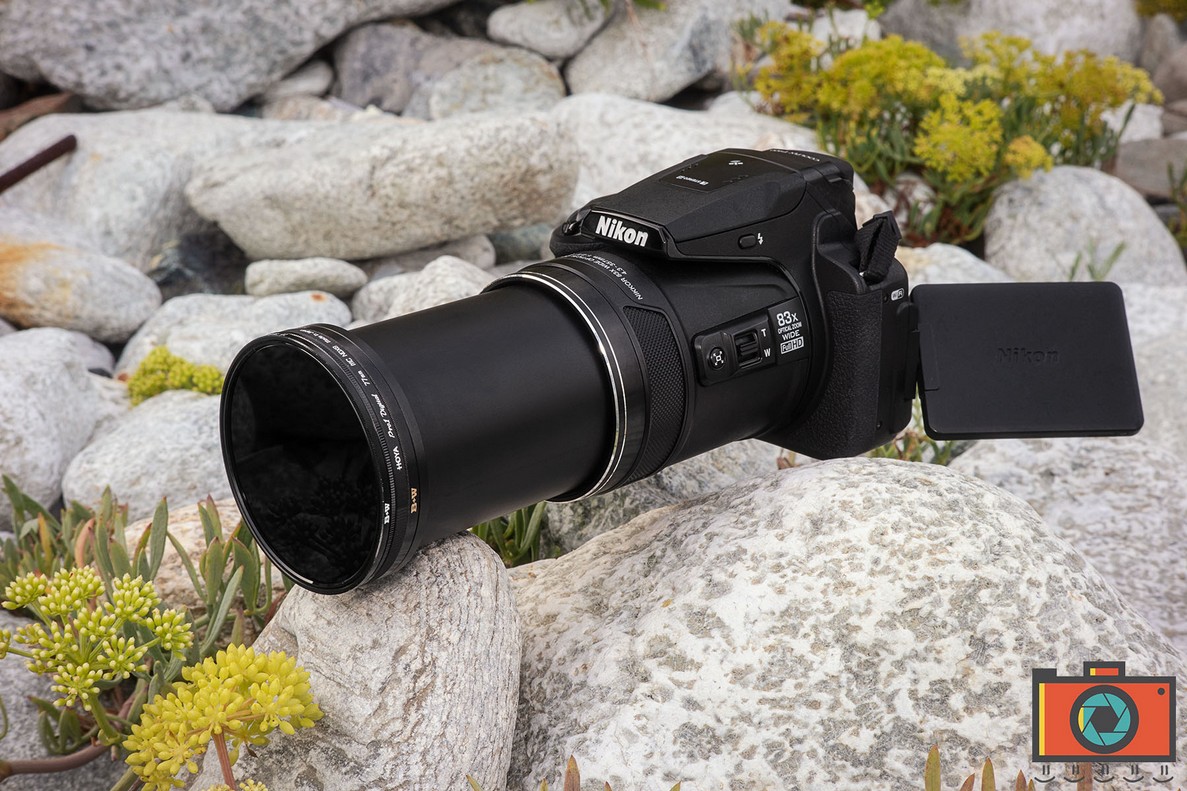
[Nikon Coolpix P900+ ND & Polarizer filters]
There is no single answer. You can use various tools, such as your SLR combined with a telescope or a powerful telephoto lens and equip them with an appropriate system of sunlight filtering or do like me. Use a superzoom camera, obviously always properly filtered! : D The advantages of using such a camera are obvious and translate into: Portability! Besides the fact that you will find in your hands a telephoto lens with a considerable focal length at a price more than affordable.
The NIKON COOLPIX P900 was my choice. I consider it a very fun and powerful camera. Its telezoom reaches 2000mm (equivalent to 35mm format)! = O In addition, the photos are of good quality considering that it is equipped only with a small 1 / 2.3 "CMOS sensor. Now its substitute is out on the market, the Nikon Coolpix P1000, with an even more powerful telezoom, 3000mm! = O But thanks to this the Nikon Coolpix P900 today can be found at a price that is more than good to start having a little fun!
Regarding the filtering system I used a series of ND filters and a cascade-mounted circular polarizer. This is certainly not the cheapest and best to use system, but I find it effective for observation by screen or via an electronic viewfinder. (If you look with an optical viewfinder, I DON'T RECCOMEND YOU TO USE a similar system, but look for and use a 100% guaranteed filtering system for the eyes!). In any case, the filters I use are B+W 110 ND 3.0 1000x (10stop) + Hoya Pro1 Digital ND8 (3stop) + B+W KSM Slim circular polarizer adapted to the camera with a Step-UP Ring.
It is also important to have a solid tripod. As for me, I rely on my Manfrotto 055 and a valid and precise head. For this reason there is no better choice than the geared head 410 always of Manfrotto.
However I got my result freehand (MADNESS! =P) but ... unfortunately due to force majeure!
For the necessary photographic equipment, that's all. Regarding the resumption of the ISS transit on the Sun, it can be done in 2 ways:
- Use continuous shooting in high speed mode
- Make a video and later extract the best frames
I chose the video to be sure I could capture the transit. I recommend using the video in highest resolution and number of frames per second possible for your camera. Mine had a good 1080 50p.
STEP 3: IT’S YOUR TIME TO TRY! This is my story of how it went! ;D
It was some time I had in mind to photograph the transit of the ISS on the Sun, but I was or always too busy or there was adverse weather conditions in the day of transit.
In mid-August a good news, there was a transit of the ISS clearly visible above the sky at home. Transit that unfortunatelyI lost for a few seconds...
However I do not lose heart and find that there will be a second transit, even better visible than the first, but I have to move 35km from home to see it well. Great, it's done!
This time I did not want to be unprepared and I evaluated with the website transit-finder.com and Google Maps the best location. For to be more sure, the day before I also used Stellarium and I verified, after entering the coordinates, that in that particular place and at that particular time the ISS transit on the Sun was really there!
The long awaited day arrives, the weather is more than good, navigator is set, photographic gear is ready and it's time to go!
All very nice, but because of the navigator, I risk of losing even this transit. This because, although I left in well ahead of time for to be sure, the navigator makes me do a strange road, according to its calculates this was the fast way, but I end up on a closed road with the only bikes allowed transit.
PANIC! Looking at the map I invented the road as best as possible until the navigator recovers.
Finally I arrive, but there is no time to mount everything on tripod and adjust the head and here the madness. Film the transit of the ISS on the Sun at about 2000mm freehand!
To be more stable I lean against my car, activate the stabilizer on camera, fortunately the Nikon Coolpix P900 has got one very effective and I do a first focusing. For safety I decide to stay a little 'wider, I do not know exactly, but around 1800mm.
After I was sure to have well done the focus, I switch to manual focus to avoid incorrect changes in focus during shooting.
I take the phone, I look at the APP DIGITAL CLOCK SHG2, here we are.
H 10.42, transit begins within 49 seconds.
I start recording by mentally counting the seconds.
Time passes, I count more than 100 seconds to be sure, but I have not seen anything from electronic viewfinder.
I fear the worst. I close the recording and watch the video on the P900 screen very carefully: SUCCESS!
And now?
IT'S YOUR TIME TO TRY!
Thank you for reading this far. If you have the pleasure, let me know in the comments as it went or if you liked this post!
In addition, if you wish, do not forget to subscribe to the newsletter, you will always be updated (1/2 e-mail per month) and in the future there will be useful and exclusive content for members only. It would be nice if there were you too! THANK YOU!

